eos智能合约开发 前言
[学习eos dapp开发,看这篇就够了(下)]
(https://shaokun11.github.io/2018/10/14/%E5%9F%BA%E4%BA%8Eeos%E8%BF%9E%E6%8E%A5scatter%E5%BC%80%E5%8F%91dapp(%E4%B8%8B))
因为有阅读上面这篇文章的同学没看到源码,而我又把之前的源码给删掉了。那我也只好按照我的教程重新写一遍了。本以为copy后就能用,而当时写的时候所使用的旧版的语法,所以改了改,功能不变。
本篇文章的代码是使用的cdt1.3.2编译的
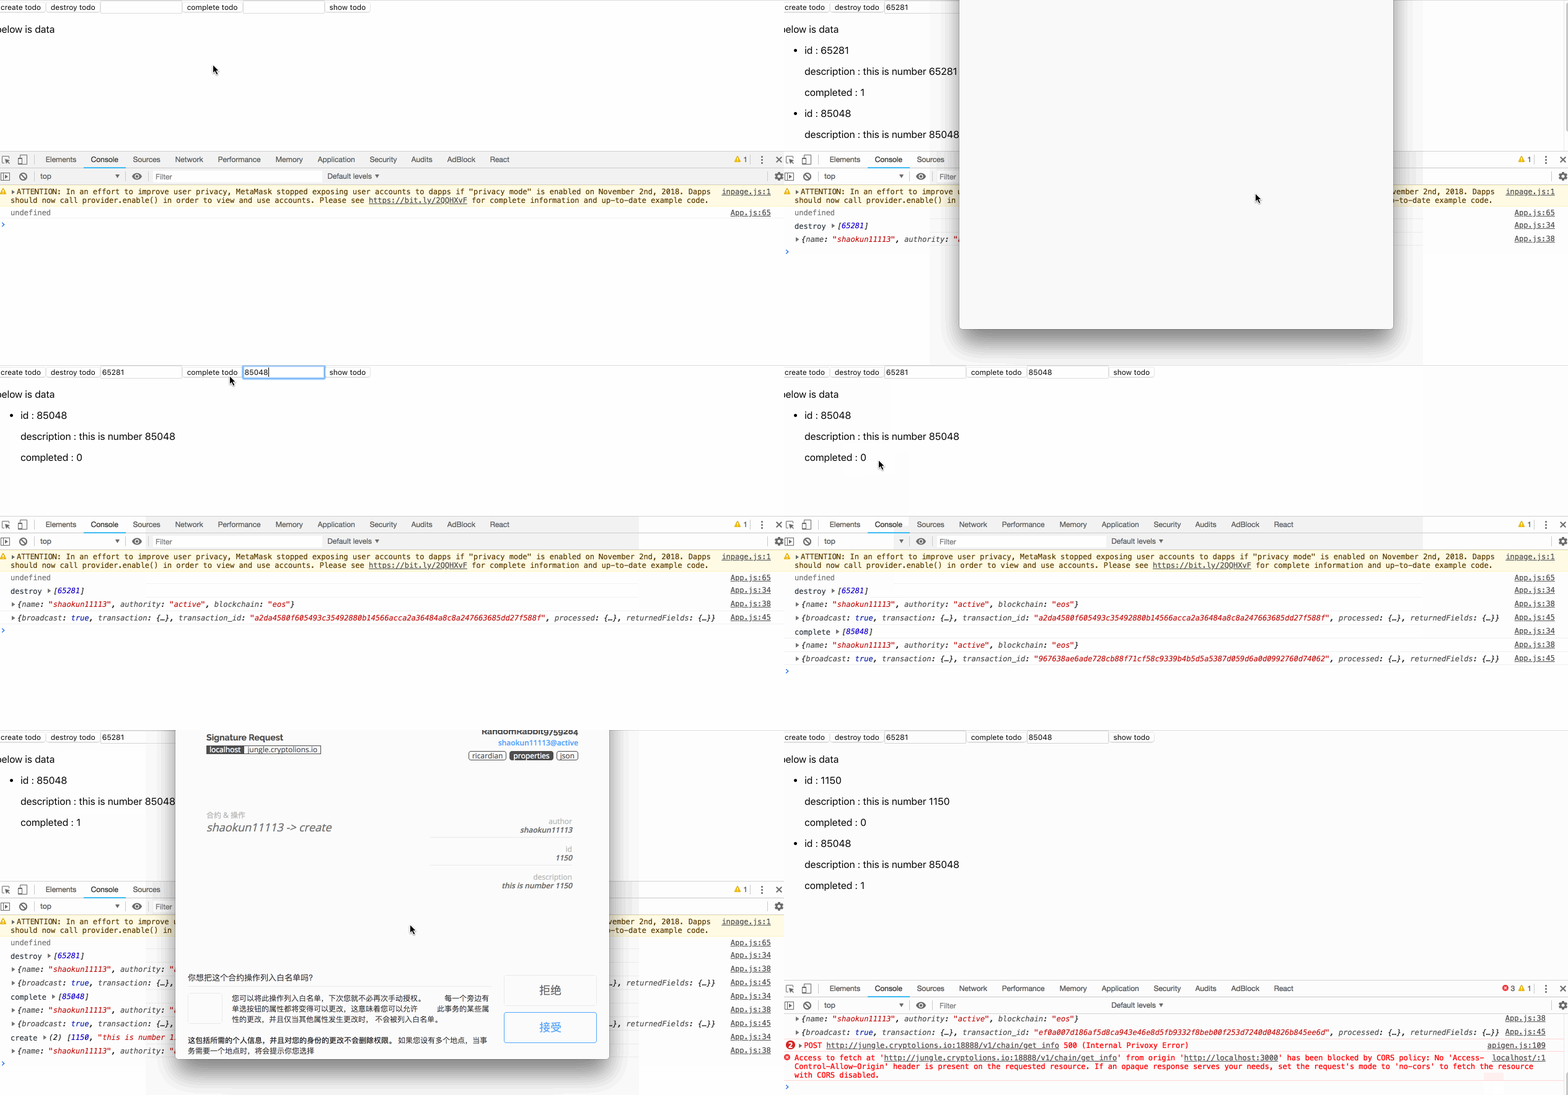
eos智能合约开发 结果展示
功能有添加todo,删除todo,和完成todo,具体看图

eos智能合约开发 源码展示
这就是最简单的页面了,希望你阅读起来不会有任何问题,项目你直接clone下来可以直接运行的
App.js
import React, { Component } from 'react';
import './App.css';
import ScatterJS from 'scatterjs-core';
import ScatterEOS from 'scatterjs-plugin-eosjs';
import Eos from 'eosjs';

ScatterJS.plugins( new ScatterEOS());


const network = {
    blockchain:'eos',
    protocol:'http',
    host:'jungle.cryptolions.io',
    port:18888,
    chainId:'038f4b0fc8ff18a4f0842a8f0564611f6e96e8535901dd45e43ac8691a1c4dca'
}

class App extends Component {

   state = {
       deleteId:1,
       rows:[],
       competedId:1,
       scatter:null
  }

    componentDidMount() {
        setTimeout(() => {
            this.init()
        }, 2000)
    }

    takeAction(action,params){
       console.log(action,params)
        const requiredFields = { accounts:[network] };
        this.state.scatter.getIdentity(requiredFields).then(() => {
            const account = this.state.scatter.identity.accounts.find(x => x.blockchain === 'eos');
            console.log(account)
            const eosOptions = { expireInSeconds:60 };
            const eos = this.state.scatter.eos(network,Eos,eosOptions);
            const transactionOptions = { authorization:[`${account.name}@${account.authority}`] };
             eos.contract("shaokun11113").then(ins => {
                return ins[action](account.name, ...params, transactionOptions)
            }).then(res => {
                console.log(res);
            }).catch(error => {
                console.error(error);
            });

        }).catch(error => {
            console.error("tack action",error);
        });
    }

    init() {
        ScatterJS.scatter.connect('todolist').then(connected => {
            if(!connected) return false;

            const scatter = ScatterJS.scatter;
            this.setState({
                scatter
            });
            alert("scatter load success")
        }).then(err=>{
          console.log(err)
        });
    }

    showTodo(){
        this.state.scatter.eos(network,Eos).getTableRows({code: "shaokun11113", scope: "shaokun11113",table: "tood", json: true})
        .then(res=>{
            this.setState({
                rows:res.rows
            })
        })
    }

    render() {
    return (
        <div>

            <div>
                <button onClick={() => {
                    const num = Math.floor(Math.random() * 100000);
                    this.takeAction("create",[num,"this is number "+num])
                }}>create todo</button>
                <button onClick={() => this.takeAction("destroy",[this.state.deleteId])}>destroy todo</button>
                <input type="text" onChange={e => {
                    this.setState({
                        deleteId: Number.parseInt(e.target.value)
                    })
                }}/>

                <button onClick={() => this.takeAction("complete",[this.state.competedId])}>complete todo</button>
                <input type="text" onChange={e => {
                    this.setState({
                        competedId: Number.parseInt(e.target.value)
                    })
                }}/>
                <button onClick={() => this.showTodo()}>show todo</button>
            </div>
            <div>
                <p>below is data</p>
                <ul>
                    {
                        this.state.rows.map((todo, index) => {
                            return <li key={index}>
                                <p>id : {todo.id}</p>
                                <p>description : {todo.description}</p>
                                <p>completed : {todo.completed}</p>
                            </li>
                        })
                    }
                </ul>
            </div>
        </div>
    );
  }
}

export default App;
todolist.cpp
include <eosiolib/eosio.hpp>

using namespace std;

class [[eosio::contract]] todolist : public eosio::contract {
  public:

  todolist(eosio::name reciever, eosio::name code, eosio::datastream<const char*> ds)
                                                        :contract(reciever,code,ds),
                                                         todos(reciever,code.value){};


  [[eosio::action]]
  void create(eosio::name author, const uint32_t id, const string& description) {
    todos.emplace(author, [&](auto &new_todo) {
        new_todo.id = id;
        new_todo.description = description;
        new_todo.completed = 0;
    });
   }

  [[eosio::action]]
  void complete(eosio::name author,const uint32_t id)
  {
      eosio::require_auth(author);

      auto itr = todos.find(id);
      // 是否用find()方法,去查找这条方法对应的实例
      eosio_assert(itr != todos.end(), "todo does not exit");
    // 这里 如果找不到,todos.end() 会返回 null
      todos.modify(itr,author,[&](auto &t) {
          t.completed = 1;
      });
  }

  [[eosio::action]]
  void destroy(eosio::name author, const uint32_t id){
     eosio::require_auth(author);
      auto itr = todos.find(id);
      if(itr != todos.end()){
         todos.erase(itr);
      }
  }

  private:
  struct [[eosio::table]] todo {
      uint64_t id;
      string description;
      uint64_t completed;

      uint64_t primary_key() const {
          return id;
      }
  };

  typedef eosio::multi_index<"tood"_n, todo> todo_index;
  todo_index todos;
};

EOSIO_DISPATCH(todolist, (create)(complete)(destroy))
- 这里有一点要说明,貌似一个账号只能部署一个智能合约,希望这个结论是正确的
- 上面的todo这个table,由于我的笔误,生成表名的时候写成了 tood,哈哈
- 合约比较简单了,交互也比较简单,细心点,仔细点,相信你也可以步入eos dapp开发的大门了
eos智能合约开发 总结
- 请一定耐心的看完文章,中间漏了一点也会造成失败
- 最开始的文章截图使用的分辨率较高,图片显示较大,如若对你阅读造成阅读困难,可以适当缩小页面进行阅读
文章允许转载,但请注明出处,谢谢
关于我
区块链技术痴迷的程序猿一枚,如果你喜欢我的文章,可以加上微信共同学习,共同进步。